

I've painted quite a few murals in my time and am always surprised at people's reactions. Some are surprised I could paint something so large. Some people are surprised that I can commit to such a permanent work on my wall. (Hey, I can always paint over it if I don't like it!) Some people are just impressed at my artistic skill. For me painting murals is easy and very enjoyable. If I could I would make painting murals in people's homes into a career. (Anyone who has advice on how to make that happen, I would LOVE to hear from you!)
Not everyone has the skill to paint their own murals though or the money to hire someone like me to do it for them. So today I'm going to give you a few tips to successfully create your own murals with as few mistakes as possible.
If you are interested in painting a mural on your wall I would suggest to start small. Something no bigger than a piece of typing paper. Maybe you collect chickens then you could paint a rooster on your kitchen cabinet door. Or maybe your kids love Winnie the Pooh. Why not paint the cartoon characters over their bedroom door or walking along the bottom of the wall? If you can color in a coloring book then you can paint a mini mural.

First select an image you like. This pheasant in flight I found on Google images and since I'm in the middle of painting a mural I thought this would be a good tutorial. Print off the image to the desired size. Don't have a printer? Use a picture from a coloring book or magazine, any picture that you can trace.

Now flip your image over and cover the back with lead pencil. Cover it once in one direction and then cover it again with graphite in the opposite direction. You want a nice heavy layer of graphite on the back. Hold your paper up to the light to see that you've covered the whole image. What we are doing here is essentially making carbon paper.

Securely tape your image onto the wall. You are ready to transfer your image. Don't try to hold it still with your hand, you'll slip and never get it lined up again. Trust me...I know!

I'm only wanting to paint a silhouette of this pheasant so I'm going to trace only the outside of the bird and not worry about any of the feather details.

(Sorry, I don't know why this picture is on the side.)
Once you've traced the image and all the details you want, remove one piece of tape and take a peek under the paper to make sure you've gotten all the lines you need transferred to the wall. Some places you may have to press harder with your pencil but if you started with a heavy layer of graphite on the back of your paper you shouldn't have a problem.

When you are ready, remove your paper and paint.
For beginners I would suggest using a very flat, simple image without much details or shading. Abstract flowers, silhouettes or cartoon characters are a good images to start with. If you feel confident enough to draw directly on your wall without tracing an image don't use a pencil. A pencil is hard to thoroughly erase from a wall without a Magic Eraser. A better option is to use white chalk. Chalk can be easily wiped off the wall and painted over without any mess.
Let's talk paint. Paint can get expensive. Even if you are only using a few colors, interior wall paint only comes in quarts and gallons at the hardware store. I really doubt you'll need that much!

Craft paint like these small bottles can be found at Hobby Lobby or WalMart. I painted entire walls with this type of paint with my students years ago and it worked just fine. The thing about this type of paint though is that it is water soluble and it can be rubbed off the wall if it gets dirty. If your mural is going to be in a place where it can get smudged and dirty, especially by little fingers, then it needs to be covered with a final protective layer.
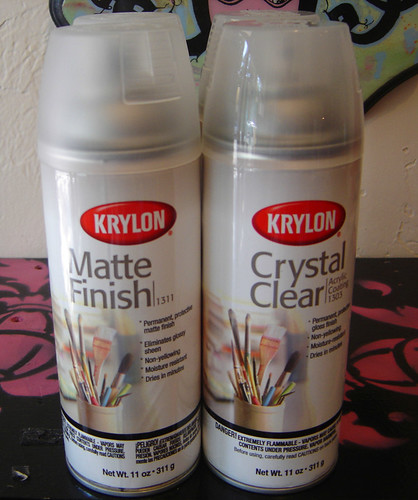
Krylon has a very good clear finishing spray, but any brand will work, that will protect the tempera paint from getting rubbed off when cleaning smudges from the wall. I prefer a matte finish and usually applied 3 layers over my finished mural. But remember if you are using interior wall paint and not craft paints you won't need to add this final clear coat.
Anyone can paint and draw! Yes, I do believe that!!
(In fact if you want to learn to draw realistically
I suggest you use this book .)
.)
Sometimes though budding artists just need a few tips and hints to build confidence along the way.


What a great post! That is so interesting.I don't know if mine would turn out that well though. You are very talented.
ReplyDeleteI know you were the child who got into trouble for drawing on the wall. Now you can say SEE! A very lovely idea. I have to trace everything. I only draw stick people. I still get into trouble if I draw on the walls.;)
ReplyDeleteHave you seen pictures of my kitchen? It's on a blog somewhere I think. I will send you the link. I had a friend "do her thing" on the walls!
ReplyDeleteLOVE your pheasant!
I am so impressed with your painting skills! I don't think I'd be brave enough to touch my wall except to paint the entire thing!
ReplyDelete